What Makes a Product Demo Video Convert?
Most product demo videos fail to convert because they focus on features instead of solving the prospect’s specific problem. The best converting videos speak directly to what keeps buyers up at night, address their exact situation, and build confidence in your solution.
Understanding how to create product demo video content requires strategy, not just filming your software. A poorly structured demo might get views but won’t drive meetings. A well-structured demo with the right message moves prospects toward booking a call.
The difference between failing and succeeding demos comes down to three things:
- They speak to the specific buyer’s problem, not general use cases
- They show how your solution solves that problem step by step
- They end with a clear next step the prospect can take immediately
Who Are You Creating This Product Demo Video For?
Your demo video will fail if it tries to speak to everyone, because the best converting demos target one specific buyer persona and address their exact problem. Generic demos that address multiple audiences convert poorly because no single viewer feels like you’re talking to them.
Before you film anything, you must know exactly who watches your demo and what they care about. This clarity determines everything that comes after.
Questions to define your target buyer:
- What is their specific job title or role?
- What business problem are they trying to solve?
- What does success look like for them?
- What’s preventing them from solving this today?
- How do they currently handle this without your product?
B2B marketing videos that target a specific persona convert 3-4x higher than generic content. When your demo speaks directly to one buyer’s situation, they feel like it was made for them. This personalization is what drives conversions.
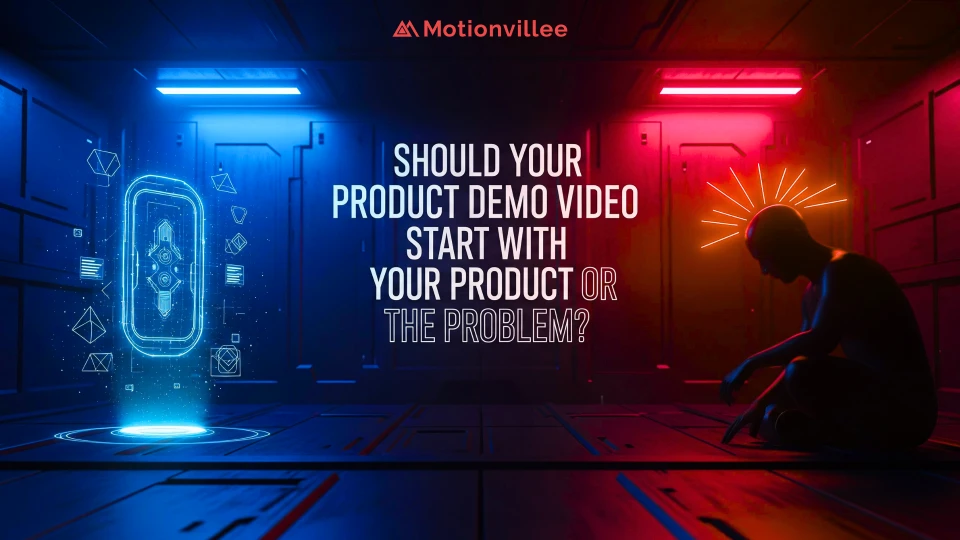
Should Your Product Demo Video Start with Your Product or the Problem?
High converting product demo videos open by addressing the prospect’s problem directly, not by showing your product, because buyers need to feel understood before they’re ready to see your solution. The biggest mistake is opening with a logo or company overview.
When you start with the problem, you establish immediate relevance. The viewer thinks “This person gets my situation.” Only after you’ve acknowledged their pain should you show how your solution solves it.
Problem-first script structure:
- Open with the problem they face (the hook)
- Show why this problem matters
- Introduce your solution as the answer
- Walk through how it works
- Show results or benefits
- End with a call to action
Your product demo script that opens with “Here’s the problem you face” outperforms scripts that open with “Here’s what our product does.” The first connects emotionally. The second starts with a feature.
Tutorial video services teach this principle too. Step-by-step approaches work best when you start with why something matters before showing how to do it.
What Should You Include in Your Product Demo Video?
A converting product demo follows a specific workflow with each section serving a clear purpose in moving the viewer toward booking a demo. Without this structure, you’re just showing features instead of making a case for your solution.
Every section of your product demo structure must answer a question the viewer has. When sections flow logically, you build confidence step by step.
The five-part product demo structure:
Problem Setup (10-15 seconds)
- Acknowledge the prospect’s challenge
- Show you understand their situation
- Create relevance immediately
Solution Overview (15-20 seconds)
- Introduce your product as the answer
- Position it as different from alternatives
- Preview the key benefits
Key Features in Context (60-90 seconds)
- Show real workflows, not feature lists
- Connect each feature to their benefit
- Demonstrate how it solves their problem
Results or Social Proof (15-20 seconds)
- Show what success looks like
- Include metrics, testimonials, or case examples
- Build confidence in the solution
Clear Call to Action (10-15 seconds)
- State exactly what to do next
- Make it specific and easy
- Create urgency if appropriate
This product demo workflow transforms feature showcase into strategic selling. When prospects follow your logical flow, they’re more convinced by the time you ask them to act.
What Tools and Settings Do You Need to Capture a Product Demo?
Quality of your recording matters less than clarity and pacing because viewers will forgive lower resolution if they can see what you’re showing and hear what you’re saying clearly. Most recording failures come from poor audio or pacing that loses attention, not from camera quality.
You need screen recording software, clear audio capture, and settings that show your product at natural speed. Moving too fast loses viewers. Moving too slow bores them.
Essential tools for recording:
- Screen recording software: Camtasia, ScreenFlow, or OBS (open source)
- Microphone: Dedicated USB microphone beats built-in laptop mics
- Editing software: Adobe Premiere, Final Cut Pro, or DaVinci Resolve
- Recording environment: Quiet space without background noise
Recording settings to optimize:
- Set screen resolution to 1920×1080 (standard HD)
- Zoom in on important areas (viewers need to see details)
- Speak at natural pace (faster when demonstrating, slower when explaining)
- Pause between major sections for screen transitions
- Record in multiple takes if needed (edit together the best sections)
When you film product demo content with proper tools and settings, you dramatically improve viewer engagement. Paid ad video content using your demos will perform better when the original recording quality is clear and pacing is smooth.
How Should You Edit Your Product Demo Video for Better Conversions?
The best converting product demo videos are tightly edited for pace and impact, removing dead time while adding visual emphasis to important features. Editing transforms a raw recording from your screen into a compelling sales asset.
Your editing decisions determine whether viewers watch to the end or drop off halfway. Tight editing keeps pace. Loose editing loses attention.
Essential product demo editing practices:
- Remove dead time: Cut pauses between sections, mouse movements that don’t add value
- Add visual emphasis: Use arrows, circles, or highlights to direct attention
- Include captions: Text reinforces key points and helps sound-off viewing
- Add graphics: Logo transitions, text overlays, and lower thirds improve professionalism
- Adjust pacing: Speed up mundane sections, slow down important features
- Add background music: Subtle music improves engagement (royalty-free options available)
Common editing mistakes to avoid:
- Leaving too much silence between sections
- Pointing out features without explaining benefits
- Using distracting transitions or effects
- Missing opportunities to emphasize key points
- Failing to add captions for accessibility
Pacing optimization directly impacts conversion rates. Demos that keep consistent, engaging pace maintain viewer attention better than slow, feature-heavy content.
What Call to Action Should Your Product Demo Video Include?
A converting product demo always ends with a specific, easy-to-understand call to action like “Book a demo” because vague CTAs like “learn more” significantly underperform. Your CTA must align with your actual business goal, not just generic engagement.
Specificity matters because it removes friction from the next step. When the viewer knows exactly what to do and how easy it is, they’re more likely to act.
High-converting CTA examples:
- “Book a 15-minute demo with our team”
- “Schedule a free consultation”
- “See pricing and start a free trial”
- “Request a custom demo for your use case”
- “Get access to a demo environment”
CTA best practices:
- State what happens next (not just “click here”)
- Make the timeline clear (immediate or scheduled)
- Reduce friction (one click to next step)
- Use action words (schedule, book, get, start)
- Align with your sales process (don’t ask for more than you need)
The demo CTA is the conversion mechanism. Without it, viewers finish watching and then have no clear direction. With a specific CTA, you remove the guesswork and make the next step obvious.
How Do You Know If Your Product Demo Video Is Converting?
Creating a converting product demo video is iterative, and you need to track which demos are watched completely, where viewers drop off, and what CTAs drive actual meetings to guide optimization. Demos that aren’t being measured aren’t being improved.
Understanding your demo analytics reveals exactly what’s working and what needs fixing. This data becomes your roadmap for the next version.
Key metrics to track:
- Watch completion rate (goal: 80% of viewers watch to the end)
- Average watch time (where do viewers typically drop off)
- CTA click-through rate (what percentage of viewers click your offer)
- Demo booking rate (how many viewers actually book meetings)
- Time on page (is the video engaging enough to keep them on your page)
How to use this data:
- If completion rate is low, your opening isn’t hooking viewers (redesign the problem statement)
- If drop-off happens at specific point, that section isn’t working (reshoot or cut it)
- If CTA clicks are low, your call to action isn’t compelling (test different CTAs)
- If booking rate is low despite clicks, your messaging isn’t qualified enough (refine targeting)
Corporate video best practices teach that measurement is essential to improvement. The same applies to product demos. Without data, you’re guessing what’s working.
Ready to Create Product Demo Videos That Convert?
Creating converting product demo videos is a skill that improves with practice, data, and strategic refinement of each element you’ve learned. The best demos start with clear strategy, follow proven structure, and continuously optimize based on performance data.
Companies that implement this systematic approach see 2-3x improvement in demo booking rates within three months. The process is straightforward: plan strategically, execute professionally, measure rigorously, and improve systematically.
Your action plan:
1-Step: Identify your target buyer
- Define the specific persona you’re targeting
- List their biggest problems
- Understand what success looks like for them
2-Step: Create your demo script
- Open with their problem
- Walk through your solution
- End with a specific CTA
3-Step: Record and edit
- Use proper tools and settings
- Edit tightly for pace
- Add visual emphasis and captions
4-Step: Measure and optimize
- Track completion, drop-off, and conversions
- Test different elements
- Iterate based on data
5-Step: Distribute strategically
- Use demos on landing pages
- Include in email outreach
- Leverage in sales enablement
- Distribute through paid channels
The systems and practices you’ve learned transform demos from nice-to-have content into revenue-generating assets. Start with one well-crafted demo targeting your highest-value buyer. Measure its performance. Then scale what works.
Ready to improve your demo conversion rates? Start by choosing which buyer persona you’ll target first. Then schedule a call with Motionvillee to explore how a comprehensive product demo strategy can accelerate your entire pipeline.