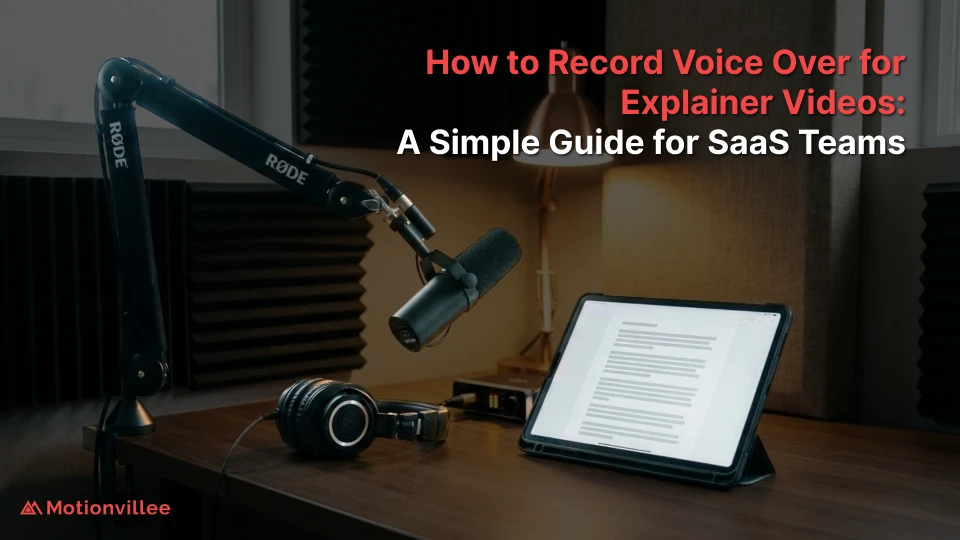
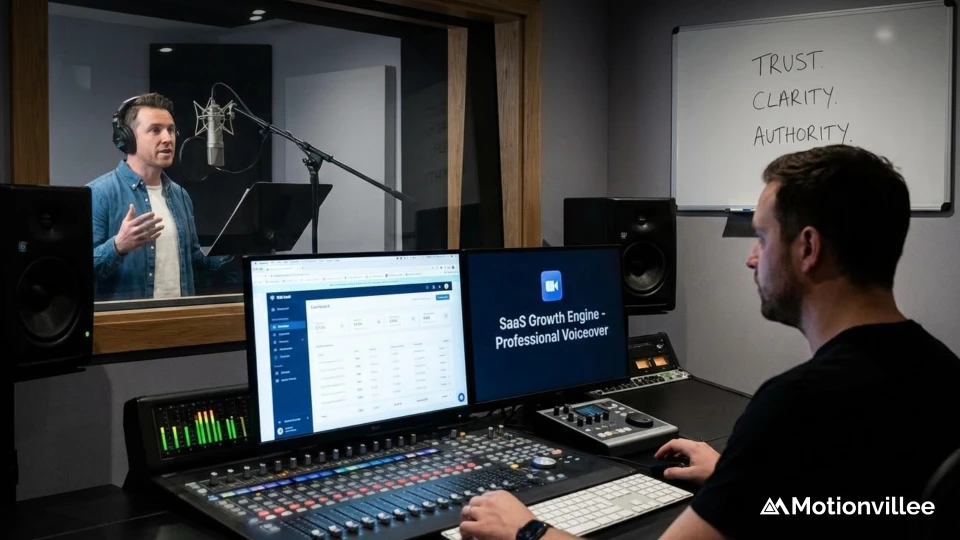
How to Record Voice Over for Explainer Videos: A Simple Guide for SaaS Teams
Learning how to record voice over for explainer videos requires understanding equipment essentials, recording space setup, script preparation, and basic editing techniques that transform amateur audio into professional-quality narration without expensive studio costs.
Why Professional-Sounding Voice Over Matters for SaaS Videos
Professional voice over quality directly impacts viewer trust, message comprehension, and conversion rates, with poor audio quality causing 68% of viewers to abandon videos regardless of visual quality or content value.
SaaS explainer videos live or die by audio quality because:
- Technical concepts require clear articulation for audience comprehension
- Professional audio signals product credibility and company legitimacy
- Poor sound quality triggers immediate viewer skepticism about product quality
- B2B decision-makers expect production standards matching enterprise positioning
Audio quality affects business metrics measurably:
- Professional voice over increases video completion rates by 35-50%
- Clear narration improves feature understanding and trial signup conversion
- Crisp audio reduces viewer drop-off during technical explanations
- Quality sound supports premium pricing perception for SaaS products
Understanding what explainer videos are and how they work helps teams recognize that voice over represents the primary communication channel requiring investment equal to visual production quality.
The Equipment You Actually Need Without Breaking Budget
Professional voice over recording requires only three essential equipment pieces costing $150-$300 total: USB microphone, closed-back headphones, and pop filter, with additional accessories optional based on recording environment.
Essential Microphone Options Under $200
USB condenser microphones in the $80-$150 range deliver broadcast-quality audio for explainer videos without requiring audio interfaces, mixers, or technical expertise that XLR professional setups demand.
| Microphone | Price Range | Best For | Key Features |
|---|---|---|---|
| Audio-Technica AT2020USB+ | $100-$130 | All-around performance | Built-in headphone jack, volume control |
| Blue Yeti | $100-$140 | Versatility, multiple patterns | 4 pickup patterns, mute button |
| Rode NT-USB Mini | $90-$110 | Compact home offices | Small footprint, quality Rode sound |
| Samson Q2U | $70-$90 | Budget-conscious teams | USB and XLR outputs, dynamic mic |
Condenser vs dynamic microphone decision:
- Condenser microphones capture more detail but pick up room noise
- Dynamic microphones reject background sound but require closer positioning
- Home office environments typically favor dynamic mics for noise rejection
- Treated recording spaces benefit from condenser sensitivity and detail
Headphones That Help You Hear What Matters
Closed-back headphones costing $50-$100 provide accurate monitoring during recording and editing by isolating sound and preventing audio bleed into microphone pickup.
Recommended headphone options:
- Audio-Technica ATH-M40x: $80-$100, industry standard monitoring
- Sony MDR-7506: $90-$110, professional studio reference
- AKG K371: $130-$150, exceptional accuracy for budget
- Beyerdynamic DT 770 Pro: $140-$170, comfortable for long sessions
Avoid consumer headphones with bass boost or enhanced features. Accurate monitoring requires flat frequency response showing exactly what recording captures without artificial enhancement or coloration.
Pop Filters, Stands, and Accessories Worth Buying
Three accessories costing under $50 total dramatically improve recording quality: pop filter eliminating plosives, boom arm positioning microphone properly, and shock mount reducing handling noise.
Essential accessories breakdown:
- Pop filter ($10-$20): Eliminates harsh P, B, and T sounds
- Boom arm ($20-$40): Positions mic optimally while freeing desk space
- Shock mount ($15-$30): Isolates mic from desk vibrations and bumps
- XLR cable ($10-$20): Only if using XLR microphone setup
Setting Up Your Recording Space for Broadcast-Quality Audio
Recording environment impacts audio quality more than microphone choice, with untreated rooms creating echo, reverb, and ambient noise that no post-production editing fully corrects.
Home Office Acoustics: Simple Soundproofing Solutions
Basic acoustic treatment costing $50-$150 transforms echoey home offices into acceptable recording spaces through strategic absorption material placement and reflection point management.
Budget acoustic treatment tactics:
- Acoustic foam panels ($30-$80 for 12 tiles) on walls behind and beside microphone
- Heavy curtains or moving blankets ($20-$40) covering hard reflective surfaces
- Bookshelf placement breaking up parallel wall reflections
- Rugs or carpet squares dampening floor reflections
- Bass traps in room corners ($40-$80 for foam wedges)
Key acoustic principles:
- Treat first reflection points where sound bounces from walls to microphone
- Avoid recording in center of empty rooms maximizing echo and reverb
- Position microphone away from windows, AC vents, and hard surfaces
- Record facing into room rather than toward walls when possible
Background Noise Elimination Strategies
Controlling background noise sources before recording eliminates problems that noise reduction software cannot fix, requiring awareness of HVAC systems, computer fans, traffic, and household activity.
Pre-recording noise control checklist:
- Turn off HVAC systems 5 minutes before recording starts
- Disable computer fans or position computer away from microphone
- Close windows blocking traffic, construction, and outdoor sounds
- Silence phone notifications and computer alerts
- Record during quiet times avoiding meal prep, pet activity, family movement
- Place “recording in progress” signs preventing interruptions
Record 10 seconds of silence before speaking to capture room tone for noise reduction reference during editing. This baseline helps software distinguish between ambient noise and desired voice.
The Closet Recording Trick That Actually Works
Recording inside clothing closets provides surprisingly effective acoustic treatment through hanging clothes absorbing reflections and creating dead, controlled sound environment without expensive studio construction.
Closet recording setup process:
- Clear floor space for comfortable seating or standing
- Bring laptop/tablet, microphone, headphones into closet
- Position microphone between hanging clothes on both sides
- Close door creating isolated recording environment
- Monitor initial recording checking for acceptable room tone
Closet recording works remarkably well for short scripts under 2-3 minutes but becomes uncomfortable for longer sessions requiring multiple takes and extended recording time.
Choosing the Right Voice for Your SaaS Product
Voice selection impacts viewer connection, brand perception, and message credibility more than production quality, requiring deliberate decisions about talent source, vocal characteristics, and audience alignment.
Internal Team Member vs Professional Voice Talent
Using internal team members costs nothing but risks amateur delivery, while professional voice talent at $200-$500 per script guarantees polished performance with appropriate pacing, energy, and technical understanding.
| Consideration | Internal Team Member | Professional Voice Talent |
|---|---|---|
| Cost | Free (internal time) | $200-$500 per video |
| Product knowledge | Deep understanding | Requires briefing |
| Delivery quality | Variable, often amateur | Consistently professional |
| Revision ease | Simple coordination | Scheduling challenges |
| Brand consistency | Changes with staff turnover | Sustainable voice identity |
When internal voices work effectively:
- Founder or CEO lending personal credibility and authority
- Product experts explaining highly technical features authentically
- Internal training videos where polish matters less than accuracy
- Startup MVPs testing messaging before professional investment
Matching Voice Characteristics to Your Brand Personality
Voice characteristics including tone, pace, energy level, and delivery style must align with brand positioning, with enterprise products requiring authoritative delivery while approachable brands benefit from conversational warmth.
Voice attribute considerations:
- Authoritative tone: Signals expertise, suits enterprise and security products
- Conversational delivery: Creates approachability for SMB and startup audiences
- Energetic pace: Maintains engagement for consumer-focused SaaS products
- Measured cadence: Supports comprehension for complex technical explanations
- Warm inflection: Builds trust for relationship-focused platforms
Gender, Accent, and Tone Considerations for B2B Audiences
Voice gender, accent neutrality, and tonal qualities impact audience reception differently across demographics and geographies, requiring intentional selection matching target buyer personas and market expectations.
B2B voice selection guidelines:
- Gender: Choose based on audience research rather than assumptions or stereotypes
- Accent: Standard American or British English for broad US/UK markets
- Age perception: Mature voices signal experience, younger voices suggest innovation
- Regional considerations: Local accents build connection in targeted geographic markets
Test voice samples with representative customers before committing to talent, measuring which voices drive highest comprehension, trust, and purchase intent for your specific audience.
Script Preparation: Writing for the Ear, Not the Eye
Scripts optimized for voice over differ dramatically from written content, requiring shorter sentences, conversational language, strategic pausing, and phonetic clarity that supports natural spoken delivery.
Converting Written Scripts for Natural Speech Delivery
Voice-optimized scripts eliminate complex sentence structures, reduce multi-syllable words, add conversational contractions, and include strategic pauses ensuring narration sounds natural rather than read.
Voice-friendly script conversion tactics:
- Read script aloud marking sentences that cause stumbling or confusion
- Replace complex words with simpler alternatives without losing meaning
- Break long sentences into shorter phrases with natural pause points
- Add contractions (we’re, you’ll, it’s) creating conversational tone
- Remove unnecessary jargon that speakers struggle pronouncing clearly
- Include phonetic spelling for unusual product names or technical terms
Understanding the process of creating animated explainer videos helps teams recognize that script optimization for voice delivery must happen before recording begins rather than attempting fixes during post-production editing.
Pacing and Timing Considerations for Technical Content
Technical SaaS content requires slower delivery pacing at 140-160 words per minute compared to 180-200 WPM standard rates, allowing viewer processing time for complex concepts and feature explanations.
Pacing guidelines by content type:
- Simple brand messaging: 180-200 words per minute
- Feature explanations: 160-180 words per minute
- Technical workflows: 140-160 words per minute
- Data-heavy content: 120-140 words per minute with strategic pauses
Include timing notes in scripts marking where longer pauses support visual transitions, emphasize key points, or allow viewers to process complex information before continuing narration.
Pronunciation Guides for Product Names and Technical Terms
Creating pronunciation guides for product names, technical terminology, and industry jargon prevents inconsistent delivery and saves recording time through clear phonetic spelling and audio reference samples.
Pronunciation guide format:
- Product name: Motionvillee (pronunciation: mo-shun-vil-ee)
- Technical terms: Write phonetic spelling in parentheses after first use
- Acronyms: Specify whether spoken as word (NASA) or letters (FBI)
- Industry jargon: Include emphasis guidance for unusual stress patterns
Recording Techniques That Eliminate Amateur Sound
Professional recording technique focuses on consistent microphone distance, controlled breathing, optimal energy delivery, and multiple take capture ensuring post-production has excellent raw material for final audio assembly.
Microphone Distance and Positioning for Optimal Capture
Maintaining 6-8 inch distance from microphone with consistent positioning throughout recording creates balanced frequency response, minimizes proximity effect, and prevents volume fluctuations that editing cannot fully correct.
Microphone positioning best practices:
- Position mic at mouth height, slightly off-axis from direct airflow
- Maintain 6-8 inches distance consistently throughout session
- Use pop filter 2-3 inches in front of microphone capsule
- Angle mic diaphragm toward mouth for directional patterns
- Mark floor position with tape ensuring consistent distance between takes
Proximity effect causes bass boost when too close to microphone, creating boomy, unnatural sound that requires extensive EQ correction. Consistent proper distance eliminates this issue entirely.
Managing Breath Control and Vocal Energy
Controlled breathing eliminates audible gasps, maintains consistent energy throughout recording, and prevents voice fatigue during longer sessions requiring multiple takes and script sections.
Breath management techniques:
- Breathe through nose rather than mouth reducing audible intake
- Turn head slightly away from mic during necessary audible breaths
- Pause for breathing at natural sentence breaks rather than mid-phrase
- Practice diaphragmatic breathing maintaining consistent vocal support
- Take breaks every 10-15 minutes preventing voice fatigue
Record standing rather than sitting when possible. Standing improves breath control, increases vocal energy naturally, and reduces chair noise creeping into recordings.
Multiple Take Strategy for Best Performance Selection
Recording 3-5 complete takes of each script section provides editing options, captures best performances, and ensures backup recordings if technical issues corrupt primary files.
Multiple take recording workflow:
- Record complete script section without stopping for mistakes
- Review playback identifying problems or improvement opportunities
- Record second take incorporating lesson from first attempt
- Capture third take if previous versions had issues
- Record challenging sections additional times until satisfied
- Label takes clearly in recording software for easy editing identification
Essential Recording Software and Settings
Free recording software including Audacity, GarageBand, and Reaper delivers professional results when configured with proper audio format settings, while paid options like Adobe Audition offer advanced features teams rarely need for explainer video voice over.
Free Recording Tools That Deliver Professional Results
Audacity (Windows/Mac/Linux) and GarageBand (Mac) provide complete recording and editing capabilities without cost, subscription, or feature limitations that compromise explainer video voice over quality.
| Software | Platform | Cost | Best Feature |
|---|---|---|---|
| Audacity | Windows/Mac/Linux | Free | Simple interface, powerful editing |
| GarageBand | Mac only | Free | Excellent for Mac users, intuitive |
| Reaper | Windows/Mac/Linux | $60 (free trial) | Professional DAW features |
| Ocenaudio | Windows/Mac/Linux | Free | Fast, simple editing workflow |
Audio Format and Quality Settings That Matter
Recording at 48kHz sample rate and 24-bit depth in WAV format captures broadcast-quality audio while maintaining editing flexibility, with MP3 export reserved for final delivery after all editing completes.
Critical audio settings:
- Sample rate: 48kHz (video standard, avoid 44.1kHz CD standard)
- Bit depth: 24-bit (provides headroom, prevents clipping)
- Format: WAV uncompressed (lossless, maintains quality through editing)
- Export format: MP3 at 192-320kbps or AAC for final video delivery
Never record directly to MP3 or other compressed formats. Lossy compression makes editing difficult and degrades quality with each subsequent export during revision process.
Organizing Takes and File Naming for Easy Editing
Systematic file organization and descriptive naming conventions prevent confusion during editing, enable quick take identification, and maintain project organization across multiple recording sessions.
File naming convention example:
- ProjectName_Section1_Take1_Date.wav
- SaaSExplainer_Intro_Take3_2025-12-17.wav
- ProductDemo_Features_Take2_Final.wav
Post-Recording Audio Editing Fundamentals
Basic audio editing transforms raw recordings into polished narration through noise reduction, volume normalization, unwanted sound removal, and strategic silence management requiring 30-60 minutes per finished minute of audio.
Noise Reduction Without Destroying Voice Quality
The Noise reduction removes background hum, hiss, and ambient sound without creating artificial, processed artifacts by using captured room tone as reference profile and applying conservative reduction settings.
<strong>Noise reduction process:
- Select clean section of room tone silence from recording start
- Use software noise profile capture analyzing ambient sound signature
- Apply noise reduction at 6-12 dB reduction (avoid aggressive settings)
- Review result checking for preserved voice clarity and natural quality
- Reduce further only if first pass insufficient
Over-aggressive noise reduction creates underwater, phased sound destroying voice quality. Better to accept minor background noise than destroy voice naturalness through excessive processing.
Normalizing Audio Levels for Consistent Volume
Normalizing audio ensures consistent volume throughout recording and matches broadcast standards at -3dB to -1dB peak levels, preventing viewer frustration from volume fluctuations.
Normalization guidelines:
- Target peak level: -3dB to -1dB maximum
- Target RMS level: -20dB to -18dB for voice over
- Apply compression reducing dynamic range for consistent listening
- Use limiting preventing any peaks exceeding 0dB ceiling
Removing Mouth Clicks, Breaths, and Unwanted Sounds
Manual editing removes distracting mouth clicks, audible breaths, and unwanted sounds that automated tools cannot effectively identify, requiring visual waveform inspection and selective deletion.
Common editing removals:
- Mouth clicks: Select and delete individual clicks visible in waveform
- Audible breaths: Reduce volume by 6-12dB rather than complete removal
- False starts: Delete recording beginning before actual performance
- Long pauses: Trim excessive silence to natural comfortable timing
- Bumps and handling noise: Remove completely as they never add value

Common Voice Over Mistakes SaaS Teams Make
SaaS teams new to voice over recording make predictable mistakes including rushed delivery, monotone presentation, and over-processing audio that experienced recording practices easily prevent.
Reading Too Fast Through Technical Information
Rushing through technical explanations to match short video targets sacrifices comprehension, with viewers unable to process complex features delivered at 200+ words per minute standard conversational pace.
Understanding how to make 30-second explainer videos and how to explain complex products in 90 seconds helps teams balance pacing requirements with comprehension needs rather than cramming excessive information into inadequate time.
Monotone Delivery That Loses Viewer Attention
Flat, monotone narration fails to maintain engagement through technical explanations, with vocal energy and inflection variations critical for holding attention during feature demonstrations and benefit discussions.
Strategies preventing monotone delivery:
- Stand while recording increasing natural energy and animation
- Smile during recording creating audible warmth in voice tone
- Use hand gestures while speaking promoting natural inflection
- Emphasize key words and benefits rather than flat consistent delivery
- Vary pace throughout script preventing rhythmic monotony
Overproduction That Sounds Artificial
Excessive audio processing through heavy compression, aggressive EQ, multiple effects layers, and unnatural reverb creates artificial sound destroying the authentic, trustworthy quality that B2B audiences expect.
Keep processing minimal: noise reduction, gentle compression, subtle EQ correction only when needed, and normalization. Natural, slightly imperfect sound builds trust more effectively than overly-processed, artificial perfection.
When to Hire Professional Voice Talent Instead
Professional voice talent justifies $200-$500 per video investment when internal recording attempts produce unusable audio, product positioning demands premium quality, or ongoing video programs require consistent brand voice across multiple assets.
Cost-Benefit Analysis of DIY vs Professional Recording
DIY recording costs only equipment ($150-$300 one-time) plus internal time (2-4 hours per video), while professional talent costs $200-$500 per script but guarantees polished results without internal time investment.
| Factor | DIY Internal Recording | Professional Voice Talent |
|---|---|---|
| Initial cost | $150-$300 equipment | $0 equipment |
| Per-video cost | Internal time only | $200-$500 per video |
| Time investment | 2-4 hours recording/editing | 30 min direction, no recording |
| Quality consistency | Variable | Reliably professional |
| Break-even point | 3-4 videos | Immediate quality, no learning curve |
Finding and Vetting Voice Over Artists for Tech Content
Voice talent platforms including Voices.com, Voice123, and Fiverr connect SaaS teams with professional narrators, with tech-experienced artists typically charging $250-$500 per 60-90 second script including revisions.
Voice talent vetting process:
- Review portfolio samples focusing on technical content delivery
- Request custom audition reading sample script section
- Evaluate pronunciation accuracy for technical terminology
- Assess turnaround time and revision policy compatibility
- Verify usage rights cover all planned distribution channels
- Check references from other tech or SaaS clients
Remote Recording Direction Best Practices
Directing remote voice talent requires clear written direction, pronunciation guides, timing specifications, and sample reference videos ensuring talent delivers appropriate pacing, energy, and emphasis without in-person guidance.
Remote direction documentation:
- Brand personality description guiding tone and delivery style
- Pronunciation guide for all product names and technical terms
- Emphasis notes marking key words requiring vocal stress
- Pacing guidance specifying slower delivery for technical sections
- Reference video showing intended visual pacing and timing
Building Your SaaS Team’s Voice Over Capability
Learning how to record voice over for explainer videos requires equipment investment under $300, basic recording space treatment, script optimization for spoken delivery, and fundamental editing skills teams develop through practice rather than formal training.
Essential capability building steps:
- Invest in quality USB microphone, closed-back headphones, and pop filter
- Treat recording space with acoustic panels or use closet recording technique
- Optimize scripts for natural speech delivery rather than written reading
- Master basic editing removing noise, normalizing levels, and cleaning audio
Professional voice over quality matters enormously for SaaS video effectiveness, with poor audio causing immediate viewer abandonment regardless of visual quality or message value. Teams must achieve minimum quality thresholds or hire professional talent.
DIY recording makes sense for teams producing multiple videos annually, allowing equipment investment amortization across projects while building sustainable internal capability. Single videos or premium positioning justify professional voice talent investment instead.
Understanding proven tips for creating effective short explainer videos, how long explainer video production takes, and the storyboarding process for SaaS videos helps teams integrate voice over recording into complete production workflows.
Voice over represents the primary communication channel in explainer videos. Invest time learning proper technique, accept that first attempts require practice, and prioritize audio quality equally with visual production for maximum video effectiveness.
Schedule a strategy call with Motionvillee to discuss whether DIY voice over suits your team’s capabilities and video volume or if professional narration better serves your SaaS product positioning and production timeline requirements.